Showing posts with label happiness is homemade. Show all posts

Friday, November 18, 2022

Sewing boxed corners


There is more than one way to "box" the corners of a homemade tote bag, but only one of them would work for the  way I wanted to make reusable grocery bags for my daughter.  The reason is that I wanted to start with one long piece of fabric instead of two separate pieces, so I would not have a bottom seam to work with.

After sewing the main piece of the bag, line up your seams until your bag comes to a point at the bottom kind of like the opposite of the way your would actually carry it.. The trick to making sure your corners are even is to make sure the side seams are exactly even.  You can also measure the marks you make on each side to double check that they are even.


Measure half of what you want your box to be.  For example, I wanted my box to be 5 inches across the bottom, so I measured up 2.5 inches from the corner tip, and marked it.  Using a ruler, I made a straight line.  (Same thing on the other side.)  Sew across the line, trim the excess, and check out your handiwork.


I'm pretty happy with the way it turned out.

I am going to iron on a design on the front and back of each bag, so I will show it again when it is completely finished.

For more crafty goodness, visit Crafty Creators, Friendship Friday, and Happiness is Homemade.
 

Friday, November 11, 2022

Crafty Sewing Time-Pocket Wall Hanging


A few days ago, I was looking through Amazon trying to find something I could hang on the wall of my craft room that had pockets.  I had been using my daughter's old hanging jewelry organizer. It was working okay, but I decided to reorganize my supplies to be more efficient, and it was simply taking too much room.  As I searched Amazon and Google shopping, I realized I could make something!  So, I did.  These are the fabrics I used.

Pink print at the top as pockets, pink roses for the main front, and solid pink for the slip pocket and back.

I didn't create a pattern.  I just knew I wanted to start with 12x14 fabric, one for the front, and one for the back.  I knew I needed interfacing, so I ironed it on the wrong side of the front fabric.  I wanted four pockets, and I wanted them shaped like the bottom half of a stop sign, like this...

This would give them some shape and more room because instead of sewing it down in that shape, I scooted the sides in until they were almost vertical, pinned, and sewed.  I decided I wanted a slip pocket at the bottom.  I just ironed some interfacing in between two 12 inch wide pieces of fabric then sewed some leftover bias tape along the top edge of the pocket.


I decided to make ribbon tags to hold the woodent dowel, and I used the ribbon as a hanger as well.  When the four pockets were finished and the ribbon tags pinned.  I put the two main pieces with right sides together and sewed all the way around the rectangle except for a small space to use for turning.


After sewing and turning, I pressed my wall hanger.  Then I topstitched about 1/8 inch all around making sure to catch the open seam I had used to trim it. I love how it turned out!  All I had to do was put the dowel through the tabs then take one long piece of ribbon and tie it to both ends.  It's ready for hanging!


The exact materials are listed below.  They are affiliate links meaning if you choose to make a purchase, I may receive a small commission at no cost to you.  This is NOT a sponsored post.

Materials:

front fabric 12x14

back fabric 12x12

4 smaller pockets with 3 inch bottom (came from the same bundle as front fabric)

slip pocket fabric (same as back) 12x4.5

Bias Tape (optional.  I already had some that matched)

Interfacing

Grossgrain ribbon

Wooden Dowel 12x3/8 inch

Thread that matches

Sewing Machine

Fiskars Fabric Scissors

Press Perfect Hot Ruler (This might be my favorite sewing supply.)

Pins or Clips

Iron and Irony Pad or Board

For other crafty posts, link up with Crafty Creators or Happiness is Homemade.

Friday, October 28, 2022

Crafty Scrapbooking


Here are some scrapbook pages I made when my sister and I went on our retreat.

The first one is from when our first granddaugter was born.

Materials


The second one was from our youngest daughter's wedding, and it's a double page layout.

Materials Used
Matting Paper from my stash
Metal Cross brad from my stash
Bling shape from my stash

I hope you liked my pages!

Some of these links are affiliate links.  If you click and make a purchase, I may receive a small commission at no cost to you.  This is not a sponsored post.


I'm linking up with Inspire Me Monday, Happiness is Homemade, and Crafty Creators,  I will link up with Friendship Friday when it is up and runnin regularly again.

Friday, October 21, 2022

Crafty Friday-An Update and Handmade Key Fobs


Whew!  My first post this week!  It's been a little crazy around here.  My sister and I were on our girls' trip.  We have done at least once a year since my dad passed, sometimes more than one.

On the last day of our trip, our mom took a fall.  We were able to see what happened on the camera we installed in her "apartment." When we got back from our trip, I went straight to the hospital.  She ended up only having to stay one night, but we have been visiting her more often since then.   She had multiple tests and blood work, but nothing is broken, and they aren't concerned it caused any damage. Thank goodness!  My father-in-law (age 93) has had a few scares recently, too.


My sister had her six-weeks-after-chemo and radiation CAT scan.  All clear for now!  Repeat in six months.  I pray it stays that way.

My blood pressure has gotten out of control.  I'm starting a new medication and I have an echo-cardiogram (not the same as an EKG) on Saturday.  Yes, Saturday.  Weird, right?  I was born with a bicuspid aortic valve, so I have to get checked every so often.

Now the fun part:

I made these key fobs!  It was super easy!


Actual materials used:

To make it, cut a 12x4 piece of fabric and 12x4 piece of interfacing. Fuse the interfacing to the back of the fabric.  With right side down, fold fabric in half longways and press.  Open up the fabric and turn each side to the middle and press.  Fold over once more and press.  Sew a straight stitch along both sides of the fabric. Fold so that you bring the two raw edges together and press.  Sew the short raw edges together to make a loop.  Give it one final press.  Attach the hardware, and that's it!

For more crafty fun, visit Friendship Friday, Happiness is Homemade, and Crafty Creators.

Have a great weekend!


Some of the links in this post are affiliate links.  If you decide to purchase something through those links (from Amazon), I may receive a small commission at no extra cost to you.  This is NOT a sponsored post.

Monday, September 26, 2022

Handmade Inspiration


Over the weekend, I made a card I've been wanting to try for a while.  It's a design created by Nick Lupu-Karayanis (aka The Bearded Housewife).   I changed the igloo by giving it a black outline instead of a white outline because I thought the white outline was too much white, and it didn't stand out.  I added clear stickles (like snowflakes).

Materials Used:

Cricut Maker (but any cutting machine would work)

Die Cuts with a View 12x12 Double Sided Cardstock Stack

Recollections Essentials 12x12 Cardstock Paper

Aileen's Tacky Glue

Easy Runner Permanent Strips Tape Runner

Reverse Craft Tweezers

Stickles Glitter Glue

Please visit Happiness is Homemade and Inspire Me Monday for a variety of handmade projects.  Have a great week!

Some links in this post are affiliate links which means if you click on it and choose to purchase an item, I may receive a small commission at no extra cost to you.  This is NOT a sponsored post.


Wednesday, March 09, 2022

Beginner Sewist- Where to Start? (A T13 Post)


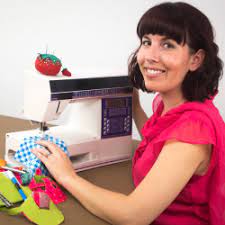
In 2019, I had a part time gig at Jo Ann Fabrics.   I really liked it so I continued even after I returned to my full-time teaching job.  I knew I would be retiring from teaching soon.  And I really loved being surrounded by all of the crafts and fabric and creativity!
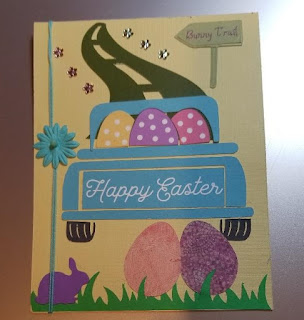
Easter Card I made last year.

I've been an avid paper crafter for years, and I dabble in wood and paint crafts, but I never thought I would take up sewing (again), until I worked at Jo Ann.  I took sewing in middle school and high school, either 3 or 4 years, and I remember the basics.  So 30-something years later, I decided to jump back in! There are so many things to create!
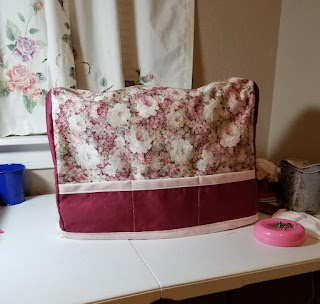
I made my own sewing machine cover.

For 2 1/2 years I have been back in the sewing game, and what I haven't been able to remember on my own, I have been able to learn and relearn.  So if you're thinking of taking up the hobby, go for it! 

There are a few obvious essentials:

1. sewing machine

2. scissors or rotary cutter (or both)

3.  needles

4. thread and bobbins

5. pins and/or clips

6. fabric

7.  tape measure

8. cutting mat

Here are a few other things that make sewing easier that might not seem so obvious.


9. Seam ripper.  I make mistakes.  I've had to take projects apart and start over.  Even the most experienced sewists do, too.

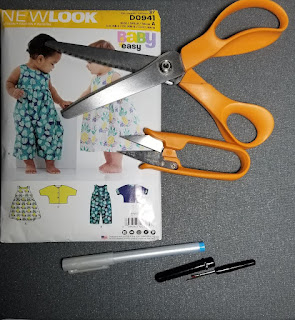
10. Pen with Soluble or Disappearing Ink.  I need to be able to mark my fabric for patterns, hem lines, cutting, and so on.

11.  Nippers.  I call them that.  They are little sewing scissors that are actually called thread snips.  Even if your machine has an automatic thread cutter, you will need these small scissors.  Your regular fabric scissors can be unwieldy when trying to cut small threads.

12.  Pinking sheers.  These not only help prevent fraying but are also one easy way to finish a seam.

13. Patterns.  I have purchased a few, but I also find free patterns on the Internet.

Bonus:  You need resources that you can trust.  There are a multitude of resources on the Internet with their own blogs, YouTube channels, and what-not. I have curated a list of sewing enthusiasts that I trust.


**Made Everyday - I usually watch Dana on YouTube where she does all types of tutorials such as zipper bags, totes, drawstring bags, skirts, quilts, backpacks, envelope pillows, and so much more!


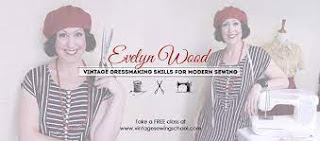
**Vintage Fashion House - I also usually watch Evelyn Wood of VFH on YouTube as well.  I don't design clothing like she does, but she explains things so well, and not only how to do something but why.    I learned about understitching and stay stitching which I had never heard of before. She taught me how to sew darts. She gives practical tips for beginning sewists like how to choose a fabric, how to read a pattern, what to do if you don't have a serger, and all about good sewing habits.


**Professor Pincushion - Their YouTube channel is an invaluable tool.  I've learned how to add piping to a pillow, gather fabric, and use bias tape.  They teach everything from basic sewing information all the way to advanced projects.


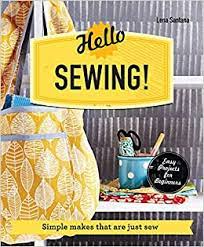
** Hello Sewing.  I spend more time on Helen's blog, but she also has a YouTube channel.  I watch her videos on her blog rather than on YouTube usually, because she also gives written directions and lots of free patterns.  She shows you step-by-step how to make your project right there on her blog.  I've made headbands with and without elastic, gift card holders, a poncho, and fabric bins.

And if you watch their videos or read their blogs, and these experts tell you not to skip a step, DON'T SKIP THAT STEP!  

I don't work at Jo Ann anymore due to COVID.  They didn't close, but I didn't want to bring COVID home to my family.  I miss being surrounded by all the creativity!  It feeds my soul! Happy Sewing!

My Pinterest Sewing Board

More Thursday Thirteen posts.

Happiness is Homemade

Crafty Creators last week and this week

Monday, March 07, 2022

Here's Cooking at You, Kid!


I'm not vegan, but I made a meal for my son-in-law, finally, because he is!  I'm pretty much a meat and dairy eater, so this was something new that I've wanted to do for a while.  It turned out delicious, if I do say so myself.  I made pesto pasta, veggies, and garlic French bread.

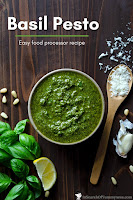
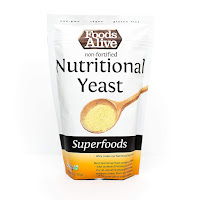
The pesto sauce was made with olive oil (of course), lots of fresh basil, pine nuts (I love them so much), spinach, garlic, water, lemon juice, salt, pepper, and nutritional yeast.   I learned that nutritional yeast, which is also considered a superfood, is often substituted for parmesan in vegan cooking.  It's not extremely cheesy, but has a nutty flavor that is quite pleasing.

My sauce was loosely based on this recipe, but I usually taste test as I'm making it and never end up following the actual measurements.

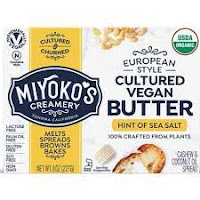
I sauteed cherry tomatoes, portobella mushrooms, shredded carrots, a shallot, and spinach in vegan butter.


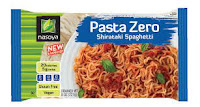
 The noodles I used were Pasta Zero spaghetti shaped shirataki noodles which are plant-based (made from konjac plant root).
The noodles, sauce, and veggies were all mixed together prior to serving. I will definitely make it again, even if my son-in-law isn't here to eat with us.  It was just that good!